

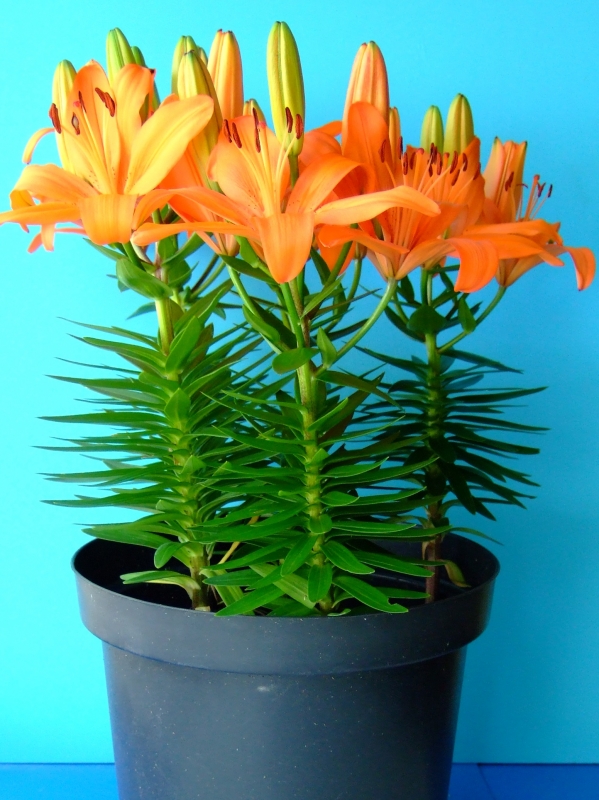
Pot Lilies
 PRODUCING POT LILIES
practical tips for
- arriving at a well-considered choice of cultivar, bulb size and pot size
- achieving a good start for production
- providing the right production conditions for the best final results
- preventing problems throughout the production phase
The proper choice of cultivar and bulb size
The available assortmentLong-established groups in the pot lily assortment are the Asiatic, Oriental and Longiflorum Hybrids, each group having its own specific characteristics. Cultivars in new groups such as the LA (Longiflorum x Asiatic) and the OT (Oriental x Trumpet) Hybrids have recently been introduced as well.
Asiatic Hybrids
In comparison with Oriental Hybrids, Asiatic Hybrids have a wider colour range, various resistances, usually more flowers/stem, and require a smaller bulb size. When compared with the other two groups, however, their flowers are smaller and less exotic-looking, and some cultivars are susceptible to leaf scorch.
Oriental and Longiflorum Hybrids
Oriental Hybrids produce large beautifully shaped flowers, smell stronger, and require less light but often take longer to produce, have a more limited range of colours, and are more susceptible to certain diseases. The Longiflorum Hybrids are characterised by their large, calyx-like flowers and good forcing properties. On the other hand, they have a very limited colour range. In the past, the somewhat shorter lily cultivars used for cut flower production were also used to produce pot lilies. To keep these cultivars short, growth inhibitors were used by immersing the bulbs in growth inhibitor solution, applying it in liquid form to the potting soil or spraying it onto the leaves. Results were very inconsistent, and depended on many factors such as production period, substrate used, production temperature and cultivar characteristics. These agents are not authorised for use in all countries and are retained in the soil for a long time. At present, a large number of genetically short lilies in many colours are available for year round production, thus eliminating the need for growth inhibitors.
Coordinating bulb and pot sizes
Various bulb sizes (expressed in the number of centimetres around their circumference) can be used for producing pot lilies. The table below indicates the best bulb sizes for the various groups of hybrids when planting the bulbs 1, 3 or 5 to a pot. However, the cultivar’s total leaf volume should always be considered, and the number of flower buds per pot, as suggested in the table, should be considered a minimum requirement. The number of bulbs planted per pot (1, 3 or 5) depends specifically on the cultivar.
Table 1. An indication of the best bulb sizes for planting 1, 3 or 5 bulbs/pot
| per pot | asiatic & la hybrids | oriental & ot hybrids | oriental & star gazer-type hybrids | longiflorum hybrids |
| 1 bulb Bulb size Flower buds | 14-16,16-18 5-7 |
16-18,18-20 4-5 |
14-16,16-18 3-5 |
14-16,16-18 3-4 |
| 3 bulbs Bulb size Flower buds | 12-14, 14-16 10-20 |
12-14, 14-16 5-10 |
12-14, 14-16 6-10 |
12-14, 14-16 6-10 |
| 5 bulbs Bulb size Flower buds | 14-16, 16-18 25-35 |
14-16, 16-18 10-25 |
14-16, 16-18 15-25 |
14-16, 16-18 15-20 |
Table 2. Recommended bulb size per pot size
| pot size | bulbs/pot | bulb sizes (in cm.) |
| 10 cm | 1 | 12/16 |
| 12 cm | 1 | 12/+ |
| 13 cm | 3 | 12/14 |
| 15 cm | 3 | 12/16 |
| 17 cm | 3 | 14/+ |
| 19 cm | 5 | 14/+ |
• planting Longiflorum Hybrids in the summer and autumn
• using double-nosed bulbs
A careful start using properly treated bulbs
Proper coordination with supplier during the ordering processPlacing your order in good time gives you the security of knowing that your supplier can draw up a good schedule for the kind of treatment(s) required for the cultivars you want. The best time to purchase is before the ‘new harvest’ is lifted. When placing your order, provide all preferences and other details, particularly: name of cultivar and bulb size, preferred delivery and bloom dates, climate information during the scheduled production period, whether shading is an option, and whether you can store the bulbs properly after receipt.
Care of bulbs after receipt
If you receive the bulbs in an unfrozen state (either with or without a short shoot), they can be planted immediately or be pre-rooted in crates during which the plastic is opened and the crates are piled into single stacks and stored at 10-12°C for a few days. If postponing the planting date, store the bulbs with the crates piled into single stacks in a cold-storage room at +0 to 2°C, an RH of 95 - 98%, and little air circulation for no longer than 1 to 2 weeks. Bulbs with shoots longer than 5 cm. will have to be planted as soon as possible. Higher storage temperatures and longer storage periods will result in undesirable shoot growth and desiccated bulbs. Bulbs that are still frozen upon arrival can be stored in a frozen state at -1°C if desired. Consult with your supplier about the maximum storage period. If the frozen bulbs are to be planted straightaway, the crates and their plastic should be opened and the crates should be piled into single stacks and left undisturbed in a facility kept at 10-12°C with good air circulation. Due to the risk of frost damage, never freeze any bulbs once they have thawed. If the frozen contents of one crate have to be planted on two different planting dates, break the frozen mass apart.
Properly prepared for production
Substrate has to be well-aerated and moisture-retentiveThe substrate used in pots should be a moisture-retentive, well-aerated medium. A commonly used substrate is potting soil: a mixture of peats sometimes combined with Perlite (fluorine-free!) or sterilised rice hulls, coco peat or garden mould. Effective peat mixtures that are often used in lily production are 40-80% year-old, frozen black peat + 60-20% peat litter (white peat type). The pH will have to be adjusted to 5.0-6.5 for Oriental and OT Hybrids and to 6.0-7.0 for Asiatic and LA Hybrids. The rule of thumb for increasing the pH by a factor of 0.4 is to add around 1 kg. of calcium carbonate to every cubic metre of potting soil mixture. A basic dressing of 1 to 1.5 kg. Osmocote 14-14-14 compound fertiliser and 1 to 2 kg. sulphate of potash and magnesium should be added to every cubic metre of potting soil mixture. The potting soil should be fairly moist during planting.
The planting itself
The bulbs should be planted on a 1 cm. layer of potting soil covering the bottom of the pot. If 2 or more bulbs are being planted per pot, the bulb noses should be aimed toward the nearest side of the pot. Then fill the pot with a layer of potting soil preferably 8 cm. thick. It should be remembered that the thicker the layer of soil, the greater the water buffer during production. After planting, water the pots thoroughly.
Greenhouse or refrigerated storage facility?
Once planted, the pots can be housed immediately or stored for one or more weeks in a refrigerated storage facility. Placing them in cold storage can serve various purposes. One of these is to distribute labour: the bulbs can be planted during otherwise unprofitable hours and then put into storage at -0,5 to + 2°C for up to 6 weeks. This will keep the shoots and roots from developing to any great degree. After storage (or immediately after planting), the ideal temperature for an excellent, problem-free development of roots (both bulb and stem roots) is 10 - 12°C. A refrigerated storage facility will be needed to maintain this temperature, particularly during the summer months. Once the stem roots have developed, which occurs about 2-3 weeks after planting, the crates can be placed in the greenhouse. While still in the refrigerated storage facility, be sure to monitor shoot lengths regularly and prevent the substrate in the pots from drying out by keeping the floor wet.
Adjusting climate to the type of cultivars
Monitoring greenhouse temperature and RHOnce the pots are housed, maintaining an initial temperature of 10-12°C for the first 2 to 3 weeks is best for an optimum rooting of all the bulbs, not matter what their group. For the remaining duration of production, the following temperatures should be maintained according to group to obtain best results.
Using temperature to retard growth
Research has shown that using the DIF method (raising the night temperature as opposed to the day temperature) can reduce stem length. If feasible, it would also be possible to lower the day temperature as opposed to the night temperature. Lowering of the day temperature during the first two hours after sunrise will have a stronger impact on stem length reduction than an equal lowering of the temperature throughout the day. When applying this concept, however, remember to consider any change in climate conditions. Sprinkling with cold water (2-10°C) will also reduce the stem length of Asiatic and Longiflorum Hybrids but testing this method on a small scale first is recommended.
The cultivars and their specific temperature requirements
Asiatic and LA HybridsThe optimum average 24-hour temperature for these groups is 14-15°C. During the day, the temperature may be allowed to reach 20-25°C under the influence of the sun, and may drop to 8 to10°C at night.
Oriental and OT Hybrids
After the rooting period, maintain a temperature of 15°C at night and 15-17°C during the day. During the day, the temperature may be allowed to reach 20-25°C under the influence of the sun. OT Hybrids can more easily tolerate somewhat higher temperatures. Avoid temperature fluctuations of more than 10-12?C between day and night.
Longiflorum Hybrids
After the rooting temperature, the optimum greenhouse temperature for these lilies is an average 24-hour temperature of 14-16°C. During the day, the temperature may be allowed to reach 20-22°C under the influence of the sun. During heavily clouded periods, the greenhouse temperature can be lowered by 1 to 1,5°C. Due to the risk of ‘split calyxes’, maintain a minimum average 24-hour temperature of 14°C. An RH of 70-80% in the greenhouse is a good level. Also avoid great fluctuations in the RH that can result in a loss of quality due to leaf scorch.
Proper care and sufficient light for the best quality
Other agricultural practicesA substrate will dry out quickly in pots. Monitor this frequently and keep the substrate in the pots slightly moist at all times. Overly moist substrate can cause leaf yellowing. Leaf yellowing can also be caused by insufficient light; this can be prevented by reducing the number of pots/m2. Supplementary lighting will have to be provided during the winter months; factors in this are local light conditions and cultivar characteristics. For more information about this topic, please refer to the IBC booklet entitled ‘The Lily as Cut Flower and Pot Plant’.
Harvest and post-harvest activities: factors in the final result
Pot lilies can be sent off for distribution once the lowest buds are displaying sufficient colour (refer to the VBA stages of maturity). The distribution chain should be as short as possible in order to prevent bud drop that can be caused by lack of light. Shipping lilies off before they have reached the proper stage of development is unacceptable because they are highly susceptible to damage from lack of light. To present these products successfully, it is important to take the following steps before they leave your facility: provide the pot with sufficient water, make sure the pot is clean, remove any yellow leaves, provide the pot with a label that includes product information and consumer tips, and package the pot in an attractive sleeve. To prevent bud drop, cold storage of pot lilies should be avoided or kept to a minimum. The temperature to be maintained during cold storage or during transport should be no colder than + 5°C for most hybrids (exception: Asiatic Hybrids may be stored at +3°C). Although flower development will not be halted at these temperatures, lower temperatures will have an adverse effect on the proper opening of the buds after purchase by consumers. To prevent bud drop, the lilies should also receive sufficient light while at the retail outlet.
Optimum production conditions prevent problems
Using fresh substrate, applying the proper agricultural practices, and having the supplier treat the bulbs to protect them from diseases will help to limit the number of problems. The following table lists the most commonly occurring diseases and disorders, their symptoms, and ways to prevent and control them.| Cause | Symptoms | Prevention/control |
| Botrytis (fungus that invades foliage) | “Fire”. Both sides of the leaves display brownish speckles that can quickly enlarge. Flower buds display brown raised spots on the outer petals. | Keep the foliage dry by: reducing pot density, watering in the morning, providing extra air circulation in the greenhouse. Fog in time. |
| Penicilllium (fungus that invades bulbs) | Penicillium mould. Brown rotting spots covered with a white to blue-green fungal weft and spores. | Store the bulbs at a low temperature and prevent desiccation. Plant infected batches immediately but do not plant any bulbs with infected basal plates. Moisten substrate before planting and then keep it properly moist. |
| Pythium (soil-borne fungus) | Root rot. Affected plants are found in scattered patches and display retarded growth, drooping leaves and leaf yellowing beginning on the undersides of the leaves. Flower buds drop off, desiccate, remain small or fail to colour properly. Stem roots display light brown, rotting spots. | Use fresh substrate. Maintain a low soil temperature throughout the rooting phase. Apply proper agricultural practices. When foliage displays symptoms, reduce transpiration while keeping the substrate slightly moist at all times. |
| Leaf scorch (physiological disorder) | The upper leaves will start to curl and display white spots that will later turn brown. In extreme cases, all the leaves and flower buds will drop off. Oriental Hybrids will display predominantly brown spots on the leaf margins. | When growing susceptible cultivars, do not use large bulb sizes. During the first 4-6 weeks, prevent any occurrence of large fluctuations in temperature and RH. Maintain an RH of around 75%. Prevent rapid growth by maintaining a temperature of 10-12°C during the first 4 weeks (for Oriental Hybrids: around 15°C during the first 6 weeks). Also ensure that the foliage transpires at an effective but not excessive rate. |
| Flower bud drop (physiological disorder) | When the flower buds reach a length of 1 to 2 cm., they turn light green and fall off. | Provide optimum light conditions in the greenhouse. Reduce the number of pots/ m2 in the greenhouse before the lack of light becomes a problem. Provide susceptible cultivars with supplementary lighting during periods of low light. symptoms |
A publication of International Flower Bulb Centre P.O. Box 172 | 2180 AD Hillegom | The Netherlands t +31(0)252 62 89 60 | f +31(0)252 62 89 70 info@bulbsonline.org | www.bulbsonline.org Disclaimer The International Flower Bulb Centre accepts no responsibility for any adverse consequences resulting from the use of information obtained from this publication.